
Registration
This module is used to register new patients. It is also used to find details of patients who are already registered in the system.
To access this module, click on the “registration” icon on the ‘Home’ page. Registration icon appears as displayed below.
Go to Appendix 2: Registration Module Workflow to access Registration module flow chart
Registration Module Features
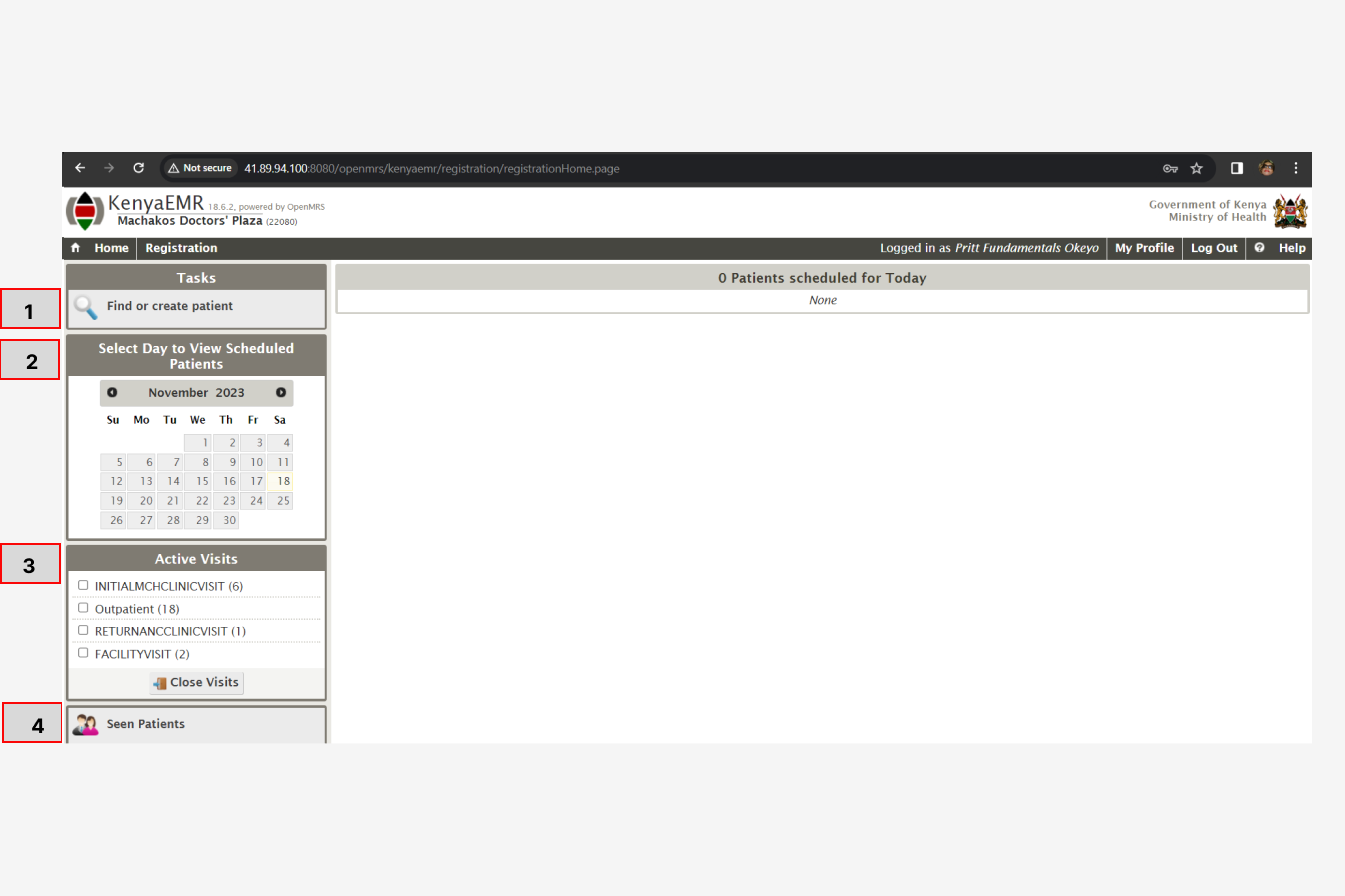
When you click on the registration icon, a window will appear as per the screenshot below. There are four tabs on the registration module which enables a user to;
-
Find or create a patient - enables a user to find a patient already registered in the system or register a new patient
-
View scheduled patients - enables a user to view scheduled patients (patients with appointments)
-
View Active visits - allows a user to view patients currently receiving services in various clinics within a facility
-
View seen patients - allows a user view patients who have visited a facility in a given day whether still receiving a service or have left the facility
The four tabs on registration module are as shown on the screenshot below;
The first step of a patient's journey in a facility begins at registration. First, find if the patient exists in the system, otherwise, create them as new patient.
Finding a Patient in the System
To find an existing patient, click on ‘find or create patient’ on the ‘Registration’ window and a window below will pop up as per screenshot below. You can search a patient by name or system patient ID in the steps below
- Click on find or create patient on the Registration window.
<Insert Screenshot>
2. Type in the patient ID or Name in the search box
<Insert screenshot>
3. The patient's details will appear on the right side of your screen, select the exact patient by clicking on their name
4. On the Patient window that will pop up, click check-in for visit as per screenshot below
<insert screenshot>
This window also allows a user to;
-
Update obstetric information of a patient
-
Add relationships information for the patient
-
Enroll them to HIV, TB, IPT, MCH & Key population services.
5. Select the preferred visit type, then finally submit.
<Insert screenshot>
6. Move to Queue Patient Module on the ‘Home’ screen to queue the patient